Creating a 3D illusion drawing is an impressive art form that can trick the viewer's perception by making a flat image appear three-dimensional. Here's a step-by-step tutorial to create a simple 3D illusion drawing.
Step 1: Choose your subject Select a simple subject for your 3D illusion drawing. A common choice is a floating or levitating object, like a cube or a ball.
Step 2: Draw the horizon line Begin by drawing a horizontal line across your paper. This line will be your eye level or horizon line. The position of this line is essential for creating the illusion of depth.
Step 3: Place the vanishing point Choose a point on the horizon line that will serve as your vanishing point. The vanishing point is where all the lines converge and create the illusion of depth.
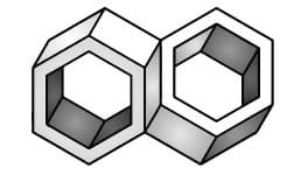
Step 4: Draw the subject Draw your chosen subject, such as a cube, centered on the paper. Keep it relatively small to leave room for the illusion of depth. For example, draw a simple cube floating in the center of your paper.
Step 5: Add receding lines Extend lines from the corners of the cube or your subject toward the vanishing point. These lines create the perspective and depth. The lines should appear to converge at the vanishing point.
Step 6: Connect the lines Connect the lines you drew in step 5, forming the sides of the cube. These lines should also converge toward the vanishing point. This creates the illusion of a 3D object in space.
Step 7: Add shading and details Shade the sides of the cube to create a realistic look. You can also add details or texture to enhance the illusion of depth. Pay attention to the direction of your light source to determine where the shadows and highlights should be.
Step 8: Ink your drawing Trace over the pencil lines with a fine-tip black pen or marker. This will make your 3D illusion drawing stand out and give it a polished look. Be sure to ink the lines of the cube and the receding lines converging at the vanishing point.
Step 9: Erase pencil lines Carefully erase any remaining pencil lines after the ink has dried, being gentle to avoid smudging the ink.
Step 10: Final touches Inspect your drawing and make any necessary adjustments or touch-ups. Ensure that the illusion of depth is consistent and that the lines are clean and well-defined.
Creating a 3D illusion drawing is a skill that can be developed with practice. You can experiment with different subjects and perspectives to create more complex illusions. Have fun exploring the world of optical art!